* 2021.02.09 작성 기준
1. Spring 프로젝트 생성
- [File] - [New] - [Spring Legacy Project]
* [New]를 눌렀을 때 안보이시는 분들은 [Other] - [Spring] - [Spring Legacy Project]를 누르시면 됩니다

- 프로젝트 이름 설정 후 [Spring MVC Project] 선택
- 패키지 명 설정
- Finish를 누르면 스프링 프로젝트 개발에 필요한 라이브러리를 Maven을 이용해 자동 다운로드됨
* 다운받은 라이브러리는 사용자 폴더 내 '.m2' 안의 repository 폴더 안에 생성됨
2. 스프링 버전 변경
- pom.xml에서 스프링 버전과 JDK 버전을 수정 후 [Ctrl] + [S] 로 저장
    <properties>
		<java-version>1.8</java-version>
		<org.springframework-version>5.1.8.RELEASE</org.springframework-version>
		<org.aspectj-version>1.6.10</org.aspectj-version>
		<org.slf4j-version>1.6.6</org.slf4j-version>
</properties> <plugin>
<groupId>org.apache.maven.plugins</groupId>
<artifactId>maven-compiler-plugin</artifactId>
<version>3.7.0</version>
<configuration>
<source>1.8</source>
<target>1.8</target>
<compilerArgument>-Xlint:all</compilerArgument>
<showWarnings>true</showWarnings>
<showDeprecation>true</showDeprecation>
</configuration>
</plugin>
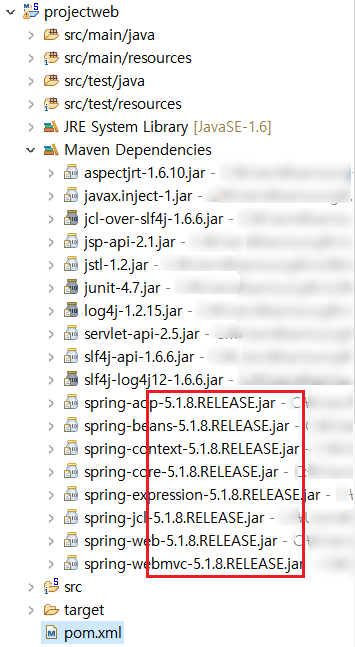
- 저장을 하면 [Maven Dependencies]의 파일 버전들이 수정됨을 알 수 있음
3. 서버 setting
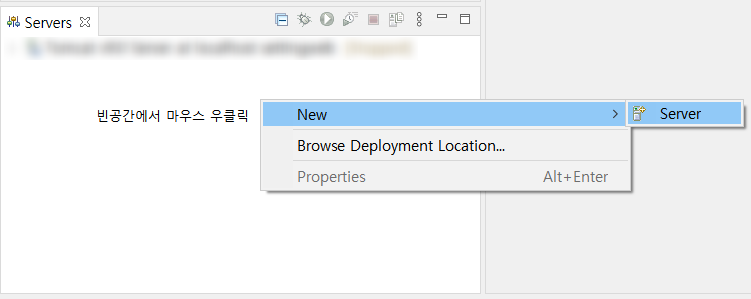
- Servers 창에서 새로운 Server 생성 [우클릭] - [New] - [Server]
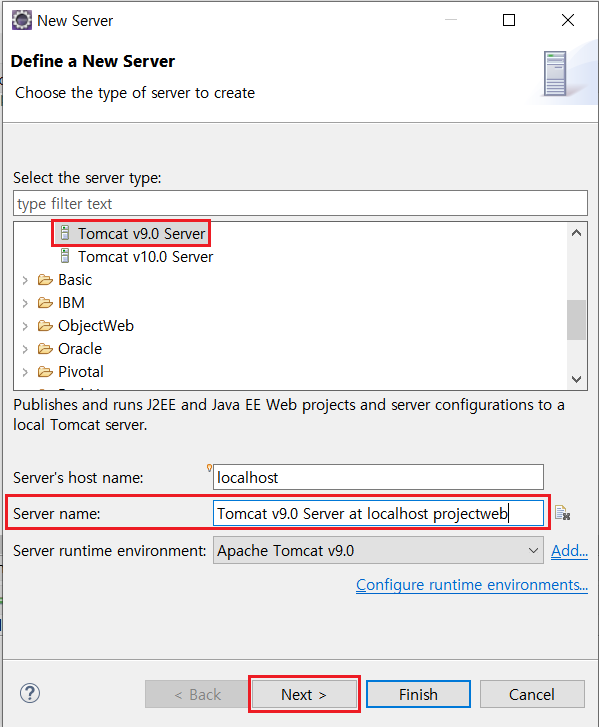
- [Tomcat v9.0 Server] 클릭 후 Server name 임의로 수정 후 [Next]
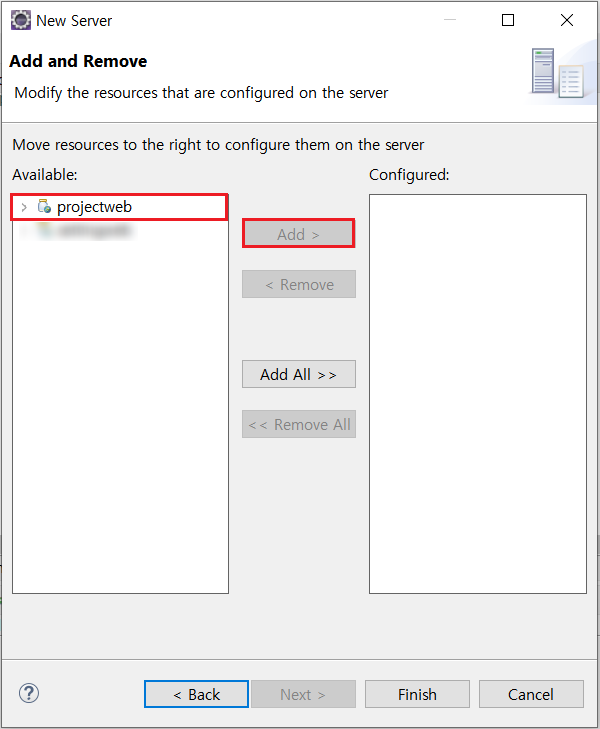
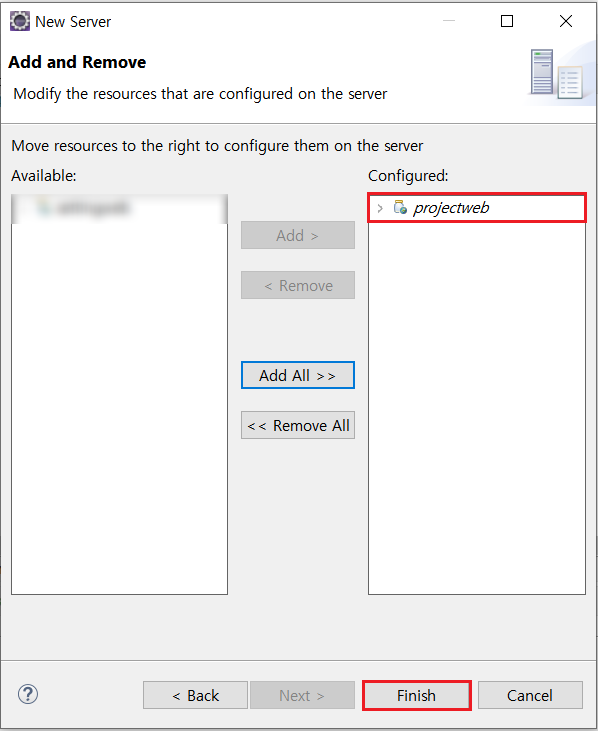
- 서버로 구동할 프로젝트를 클릭후 Add 하여 Configured로 추가
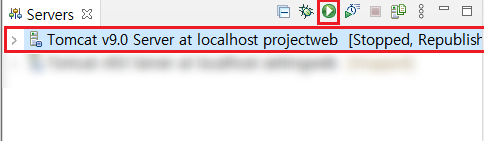
- 서버 클릭 후 우측 실행버튼 클릭
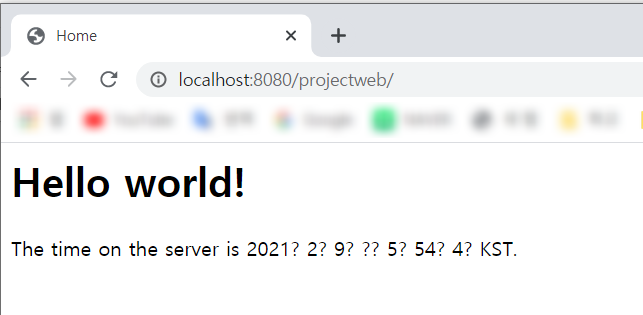
- 인터넷 주소창에 localhost:8080/프로젝트명/ 으로 접속
'STUDY > Spring' 카테고리의 다른 글
| [Spring boot] 간단한 API 개발 (0) | 2023.12.09 |
|---|---|
| [Spring] Spring, MariaDB, MyBatis 연동 (0) | 2023.12.09 |
| [Spring] MariaDB, MySQL Workbench 설치하기 (0) | 2023.12.09 |
| [Spring] Spring 개발 환경 구축 - Tomcat 설치하기 (0) | 2023.12.09 |
| [Spring] Spring 개발 환경 구축 - JDK, Eclipse, Spring 설치 (0) | 2023.12.09 |


